For the rest of this series, see Preface and Part 1.
Our Progress So Far
In Part 1 of this tutorial, I covered the tools needed to make and play a map for Quake. Specifically, I explained:
- The sourceport, Quakespasm, which allows us to play Quake on modern computers.
- The editor, Trenchbroom, which allows us to make and modify “.map” files.
- The compiler, EricW Tools , which allow us to turn our “.map” files into playable “.bsp” files.
- And the compiler graphical user interface, ne_q1sp_compilingGui, which makes it easy for us to use the compiler.
In Part 1, I also explained the folder structure and settings for these tools so that they work together. If you have all of the tools set up, let’s compile our first map!
Exploring a Map
To keep things simple, I have prepared a map for you to use, named “tutorial1.map”, which you can download Here. Once you have downloaded the map, move it to your “C:\QuakeDev\working” directory and open the map with Trenchbroom.
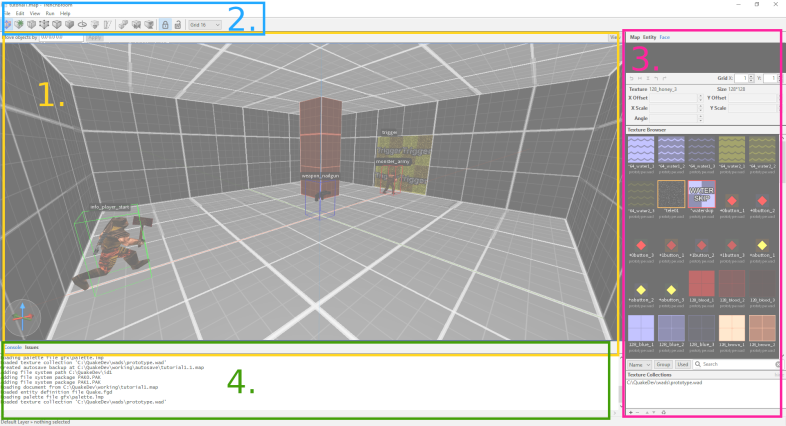
When you open the map, you should see something like the image below. If you don’t see any textures, or your editor has a different arrangement, I explain more below.

The Editor Layout
There are four main components to the Trenchbroom level editor.

- The Viewport is the biggest part of the screen with a view into the map. By default, this view shows the map in perspective with textures and a grid.
- The Toolbar is at the top of the screen, with various tools for editing our map.
- The Inspector is on the right side of the screen with information about our selection in the level. At the top of the Inspector, there are tabs for “Map”, “Entity”, and “Face”. The Inspector is where we modify properties of our entities, or apply textures.
- Lastly, we have the Info Panel at the bottom of the screen, which informs us of errors and warnings in the level.
If your editor does not look like the picture above, then you can hide or show the Inspector and the Info Panel by selecting “View” in the toolbar, and selecting the relevant option. For now, we don’t need the Info Panel, but we will need the Inspector set to the “Face” tab for the next part of this tutorial.

Adding the Texture Collection
If your view into the level shows a simple grey texture across the floors and walls, like this…

… this means that the texture package, known as a “.wad” file, is not loaded. If you compile the map without textures, the result in game will be an unpleasant red-and-white checkerboard error texture on every surface. Instead, let’s load in a “.wad” file so our map has textures.
For this map, I used the “prototype.wad” by Khreathor. If you did not download the file in part 1 of this tutorial, you can download “prototype.wad” Here. Once downloaded, move the file to your “C:\QuakeDev\Wads” directory.
Now, with the Trenchbroom editor open, go to the Face tab of the Inspector. At the bottom, there is a section labeled “Texture Collections”, where we link our “.wad” files. Select the “+” button to add the “prototype.wad” in your “C:\QuakeDev\Wads” directory. Trenchbroom will then ask for the “Path Type” for your texture collection. Select “Absolute”, and you’re good to go!

Viewport Camera
Now that we have the level loaded with textures, let’s fly around!
With the Viewport in focus (left click within the viewport), the W, A, S, and D keys control the camera movement Forward, Left, Right, and Back, just like playing the game. These directions are relative to where the camera is facing, which you can change by moving the mouse while holding the right mouse button.

The Q and X keys move the camera up and down. Unlike WASD, the Up and Down movement are not based on where the camera is facing; Up and Down are always the same. (If you prefer a different arrangement of keys, you can go to “View” → “Preferences” and then select the Keyboard icon.)
What’s in the Map
Now that we can fly around our level, let’s examine what’s here so far:
- “Brushes” make up the floor, ceiling, and walls. The pillar with the orange texture is also a “brush”. These are solid blocks that define the level geometry we will see in game.
- There is an “info_player_start”, which looks like a soldier running with an axe. This is where we will start in the map once we compile and play.
- There is a “trigger_changelevel” with the “trigger” texture on the far side of the room. This works as our level exit.
- There is a “monster_army” in front of the exit, to provide a simple obstacle for the player to overcome.
- Last, there is a “weapon_nailgun” in the middle of the room, so the player has a tool to defeat the monster.
We’ll dig into these more in the next part of the tutorial. What matters for now is that we have the “info_player_start” and our “trigger_changelevel” so that we can play through the level from start to finish.
Compiling
At this point, we have our map, “tutorial1.map”, and we have the textures applied. We also have an idea of the pieces inside the map. Now let’s compile the map so we can play it!
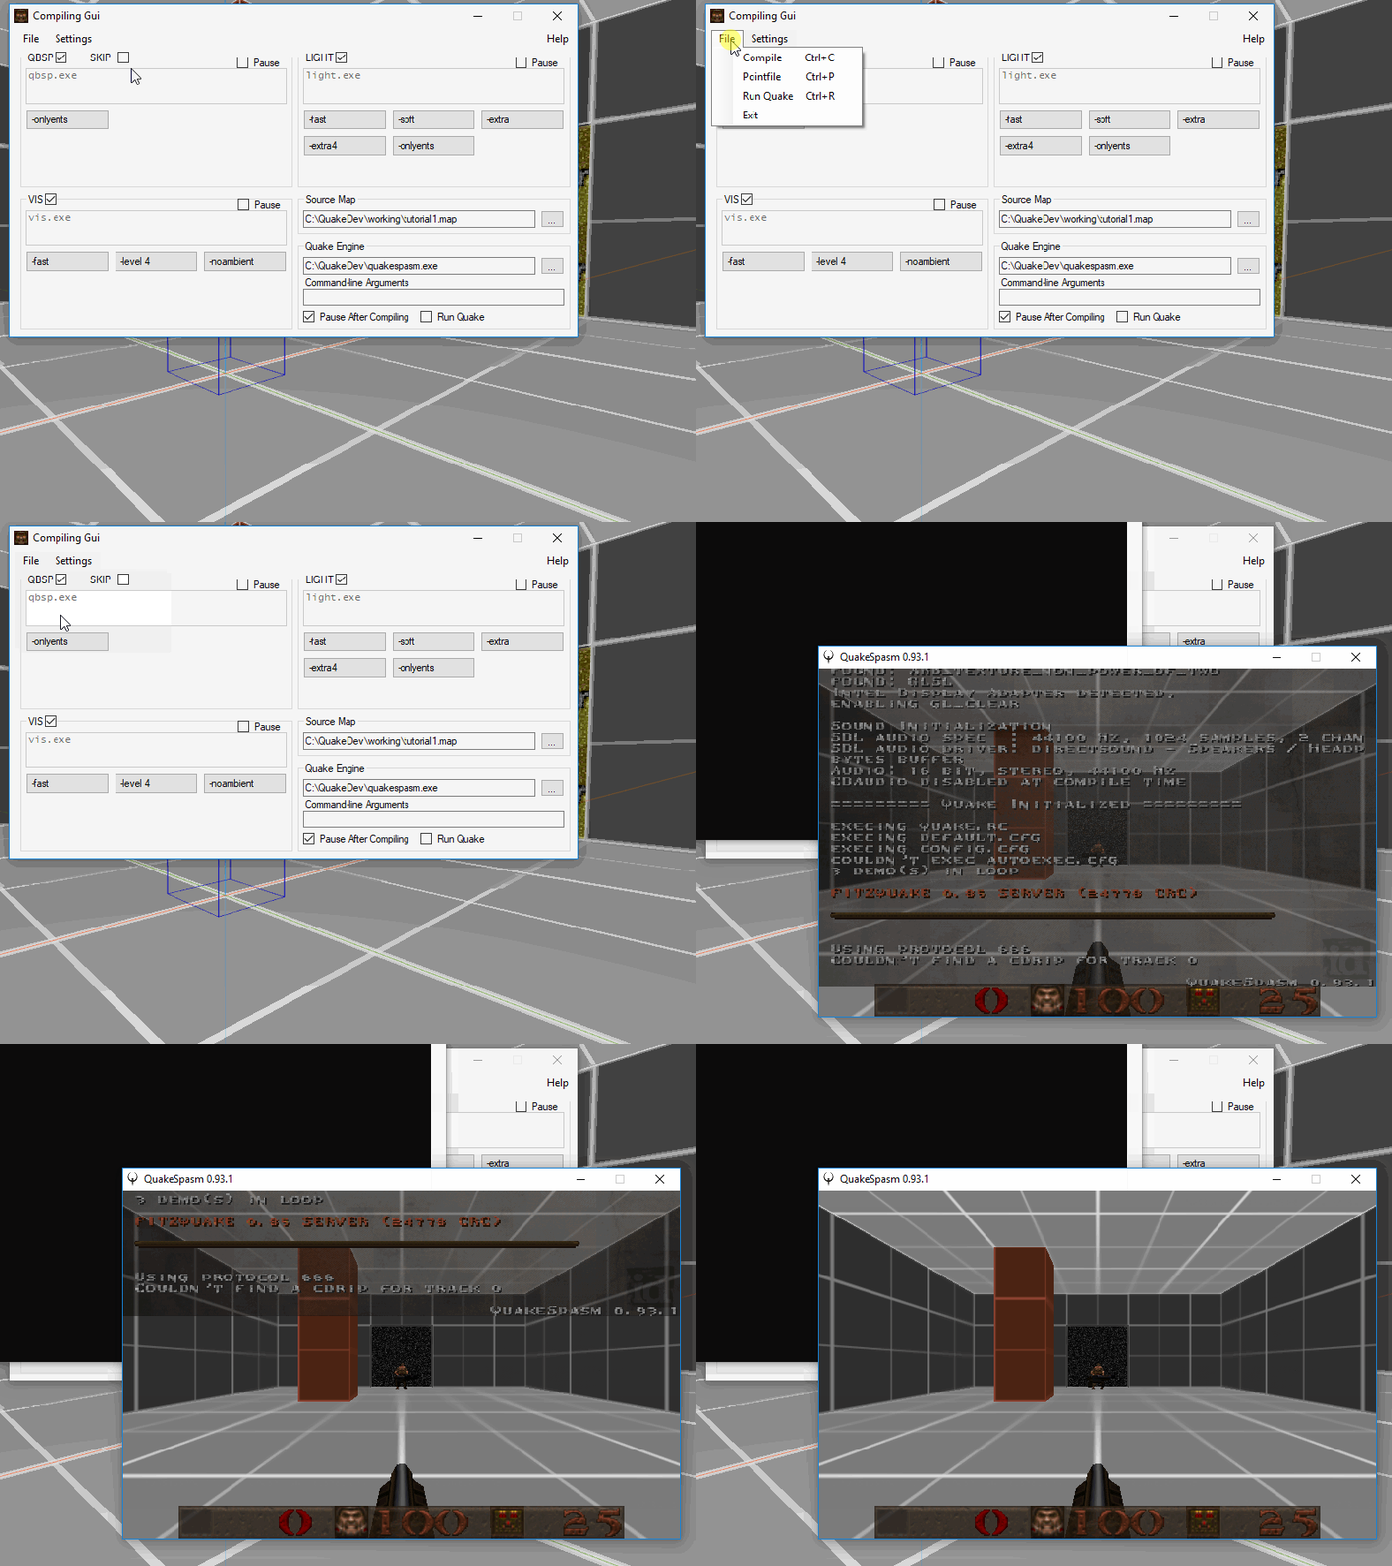
First, let’s open the compiler GUI executable in “C:\QuakeDev\Tools\ne_q1spCompilingGui103”. Here we want to set our “Source Map”, which is on the right side of the program half way down, to “C:\QuakeDev\Working\tutorial1.map”. We should also check the “Pause After Compiling” box, which will keep the compiler window open and inform us of errors. With the “Source Map” set, we can now compile by selecting “File” → “Compile”.

With our map compiled, look in your “C:\QuakeDev\id1\maps” folder for “tutorial1.bsp”. This is the compiled map.

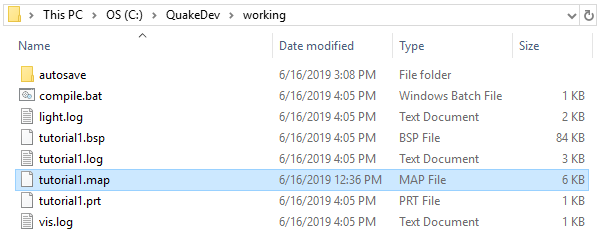
If you check your “C:\QuakeDev\Working” folder, you’ll now see some additional files. The original “tutorial1.map” file is still there for us to modify, and we also have a copy of the compiled “.bsp” and some “.log” files with information about the compiling process. What matters here is that we still have our “.map” file to modify.

Our Working folder after compiling
Playing The Map
Now that we have a compiled version of our map, we can play it. One easy way to do this is directly from the compiling GUI by selecting “File” → “Run”.

We can also run our map from within game. To do this, first open the Sourceport. Then start a new singleplayer game. Once in game, you can open the console with the tilde key, which lets you enter console commands and cheats. Here if you enter “maps”, you will see a list of all maps available to play, including “tutorial1”. To play this map, enter “map tutorial1”.

Next Time
In Part 3 of this tutorial, I cover several different methods for making your first level.
In addition, here are some resources for you to continue learning:
- Dumptruck_DS’s Trenchbroom Video Tutorials
- The mapping tutorial on QuakeWiki.org
- The Quake Mapping Discord for help and questions. (You can ping me @ mclogenog)
- The Quake level repository Quaddicted
- The Quake forum func_msgboard. This is where people post new releases and organize mapping events. (This branch of the community can be a little rigid in Quake orthodoxy, and also a bit of a boys club, so visit the forum with caution.)