In 2017’s Call of Duty: WWII, the best multiplayer map is “Sainte Marie du Mont”, better known as “the one with the red house in the middle.” This level sticks to patterns we see across the other maps, but breaks them in a few ways to be more dynamic and memorable than its peers.

The “red house” in the middle of the map, as viewed from the Allied side
First for some background, the way I play Call of Duty affects the way I perceive the maps. Specifically, I play Hardcore Team Deathmatch where weapon are more deadly (one torso shot with a pistol can kill), and where there is no radar without a killstreak reward. I also play Call of Duty with my dad, whose reflexes (and ping) prevent us from executing fast strategies.
Here’s an overhead view of “Sainte Marie” pulled from the game’s UI:

The formula for Call of Duty: WWII’s multiplayer maps is to have two spawn areas connected by three different routes. These routes then have lateral connections, which create loops, skirmish lines, and opportunities for flanking.
The two spawn structure of WWII levels also leads to spawn flipping. Specifically, there is some respawn logic that determines whether a spawn point is valid. The details of this logic are hidden to players, but it may include proximity to enemies or being within an enemy’s field of vision. The result of this respawn system with this level design is that if one team pushes across the map and starts fighting enemies as they emerge from their spawn, then the team spawn locations will swap, with the Axis now pushing north from the Allies spawn, and the Allies pushing south from the Axis spawn.
On some maps, including “Sainte Marie”, there are several spawn points in the middle, which come into play if the enemy team controls both spawn areas. These spawn points seem to have a lower priority, given that they are in more dangerous areas, so it is a bad sign when you spawn at one.
Additionally, because the only way to earn points in Team Deathmatch is with kills, and kills grant rewards that make it easier to earn additional kills, there is a slight feedback loop that lets the team in the lead extend their lead. On the losing side of one these feedback loops, this means you have to push harder and take more risks to regain a lead. On the other side, players can sit back watching from strong angles, and wait for enemies to step into the open. With Hardcore rules in particular, the player who moves around the corner will die to the player who was aiming at it.

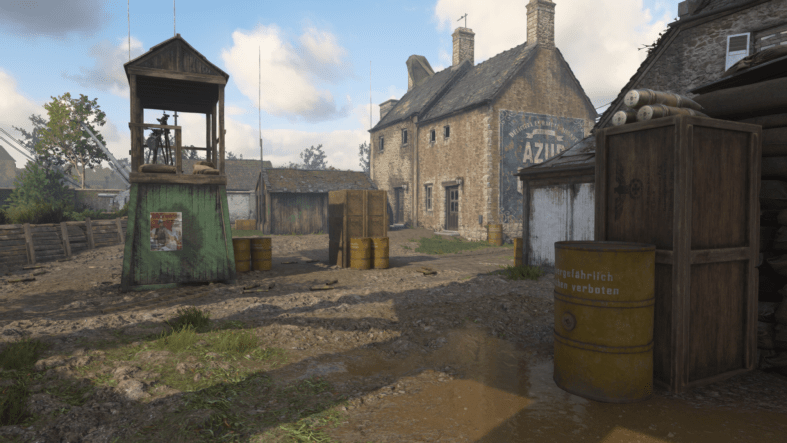
Radio tower and one of the streets that form a skirmsh line across the map
As a function of these mechanics, one general strategy is to push forward past the middle of the map (but not so far as to cause the spawns to flip) and kill enemies as they sprint toward the middle of the map. Even after losing a fight from this forward position, both teams are on similar balance for the next fight, which will occur in the middle of the map. This strategy is only stable so long as teammates don’t cause the spawns to flip, which will mean enemies attacking from behind.
“Sainte Marie du Mont” varies this pattern from the other maps. Instead of an open arena in the middle like “Gibraltar”, or the open street in “Aachen” and “Ardennes Forest”, “Sainte Marie” has a two story building with vantage points overlooking each side of the map. Players can still push past the middle building and fight from those angles instead, but the ability to defend this “red house” reduces the speed with which map control swings from one team to another. Defending red house slows the pace of the match.

Green tower, viewed from Allies side
But it is also possible to bypass the red house with the lanes to either side. If one team has locked down control of the house, the other team may be better off ignoring it and picking up kills in the flanks. The red house is also vulnerable to grenades, with its tight spaces and limited cover. In both of these ways, the red house can become a kind of noob trap. That is, everything about the level’s design and aesthetics suggests the red house is the most important location to control, but actually holding this house and fighting from its windows is less effective than fighting from an advanced position in the streets.

The interior second story of red house
In the best matches on “Saint Marie”, The red house is a pivot for control of the whole map. There are moments fighting from the red house, where it feels like I am clinging to the map and need to hold out long enough for my allies to respawn and reinforce. This scramble for control of one building has a thematic richness to it, and generates stories that are more compelling than any one moment of skillful play.

The first floor of the red house, and its dangerous staircase
Of course, there’s still something odd to me about a multiplayer game where players dress up in period-authentic uniforms and fire period-authentic weaponry to play something more akin to paintball than historical combat.
For more on that note, you should read Rob Zacny’s article on Watching History Fade Away in Call of Duty: WWII, and Cameron Kunzelman’s column on how The New ‘Battlefield 1’ DLC Demonstrates the Brutality of Multiplayer War